Psychometric tests for pilots
Angles Test: Method and Direction of Rotation
By ForAllPilots · Published · 4 min read
Reviewed and approved by the site's editor before publication. Our method (FR)
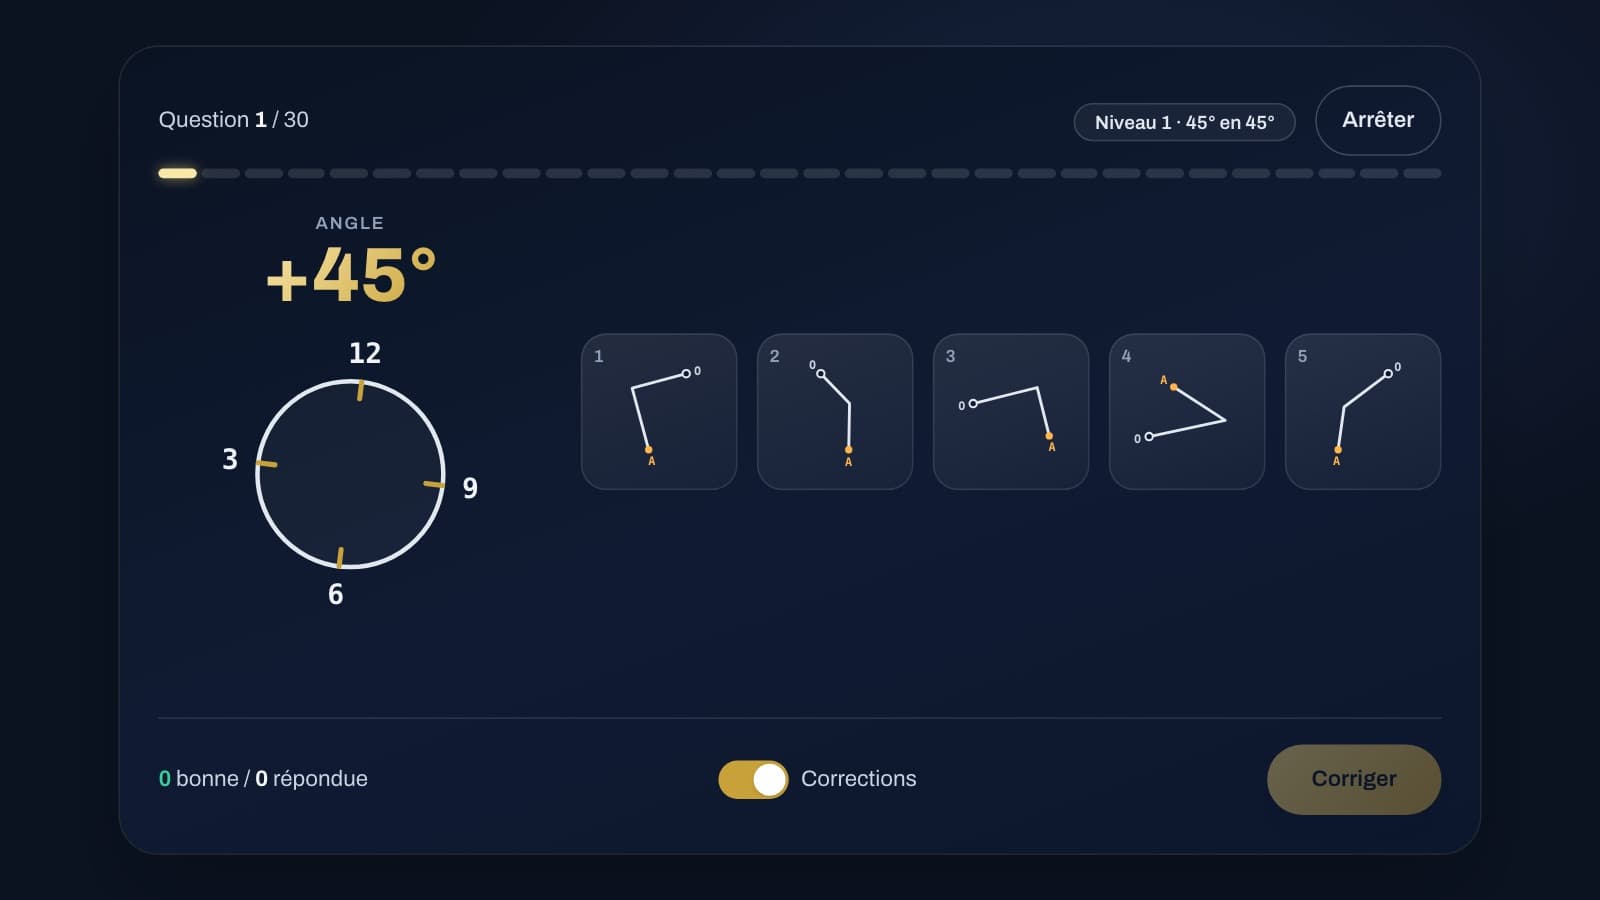
In the angles test, you are shown a clock face (with the numbers 3, 6, 9 and 12), an angle value and five figures, and you have to find the figure that matches, turning in the right direction. This plane-representation exercise looks simple, but everything comes down to details: a reversed direction, an angle greater than a half-turn, a mirrored clock face. Here is a method to avoid these traps. Note that the exercise itself is currently available in French only on forallpilots.fr; the method works in any language.
What the exercise shows
Each figure joins a point O, the origin, to a point A, the arrival point, by a bend. What matters is the angle you have to turn through, going from O to A, to pass from the first segment to the second, and the direction in which you turn. The clock face displayed with the angle value gives the positive direction: the order 3, 6, 9, 12 is read in the positive direction of rotation. The clock face may be rotated, or even mirrored, which reverses the positive direction.
A positive value is read in the positive direction of the clock face, a negative value in the opposite direction. If the clock face runs the other way from usual, an angle of +90° is therefore, on screen, a quarter-turn anticlockwise, the opposite of the hands of an ordinary clock.
Step 1: settle the direction first
Before looking at the figures, settle the direction: starting from the 3 and turning clockwise, note whether you land on the 6 (the positive direction is the usual clockwise one) or on the 12 (the positive direction is reversed). Combine that with the sign of the value: if it is positive, you turn that way; if it is negative, the other way. This reflex already eliminates at least one figure, because every question contains a figure showing the right angle in the wrong direction, a classic trap. At levels 1 and 2, two or three figures turn the wrong way.
Do this on every question, even when you think you have understood the clock face: the positive direction is drawn at random for each question, so two successive questions can have different clock faces.
Step 2: reduce large angles to a simple angle
At level 2, the angle goes beyond a half-turn: 225°, 270°, 315°, with both signs. Reduce these to a simple angle. An angle of −270° gives the same figure as an angle of +90°, since 360 − 270 = 90 in the other direction. Likewise, 270° in the positive direction is a quarter-turn in the negative direction. Remember these equivalences: 270° = −90°, 315° = −45°, 225° = −135°.
For angles in steps of 45 degrees, take the right angle as your reference: 45° is half a right angle, 135° is a right angle plus 45°. For the intermediate angles of level 3 (15°, 30°, 60°, 75°, 105°, 120°, 150°, 165°), compare them with the benchmark angles: 30° is a third of a right angle, 60° is two thirds, 75° is a little less than a right angle. Each figure is randomly oriented: do not compare it with the horizontal, but with the gap between its two segments.
Step 3: eliminate before measuring
Deal with the five figures in this order: first the direction (see step 1), then the rough size of the angle, then the exact value to separate the figures that remain. For the rough size, think about the bend: a 45° angle gives a very open bend, almost a straight line, and a 135° angle gives a very tight bend, almost a half-turn. A 90° angle can be recognised by eye as the corner of a piece of paper: compare each figure with that corner.
Do not try to measure to the nearest degree: at levels 1 and 2, no wrong figure is closer than 45° to the right one, so a quick comparison by eye is enough. At level 3, a wrong figure may be only 15° from the right one: compare it with the benchmark angles from step 2. If two figures seem to show the same angle, one of them may be turning the other way, like a mirror image: go back to step 1.
For practice
A set always runs from level 1 to level 3: use the first ten questions (in steps of 45°) to build the direction reflex, then move on to the large angles and the intermediate angles. On the keyboard, keys 1 to 5 choose a figure and Enter works as Check answer, then moves on to the next question. Keep Show corrections switched on, which is the default setting: the right figure turns green and your wrong answer red, with an explanation of the angle value and the direction to read, which teaches you more than a bare "wrong". At the end, the results screen gives your score by level and your mistakes.
On ForAllPilots, the French-language angles exercise offers 30 questions in three levels of ten, with your score as a percentage and your class from 1 to 9 on the exercise's own scale, not that of a selection process. Your history and statistics are kept on this device. It is practice included with the ATPL subscription, not an official test.