Psychometric tests for pilots
RMI, horizon and heading: reading three dials at once
By ForAllPilots · Published · 3 min read
Reviewed and approved by the site's editor before publication. Our method (FR)
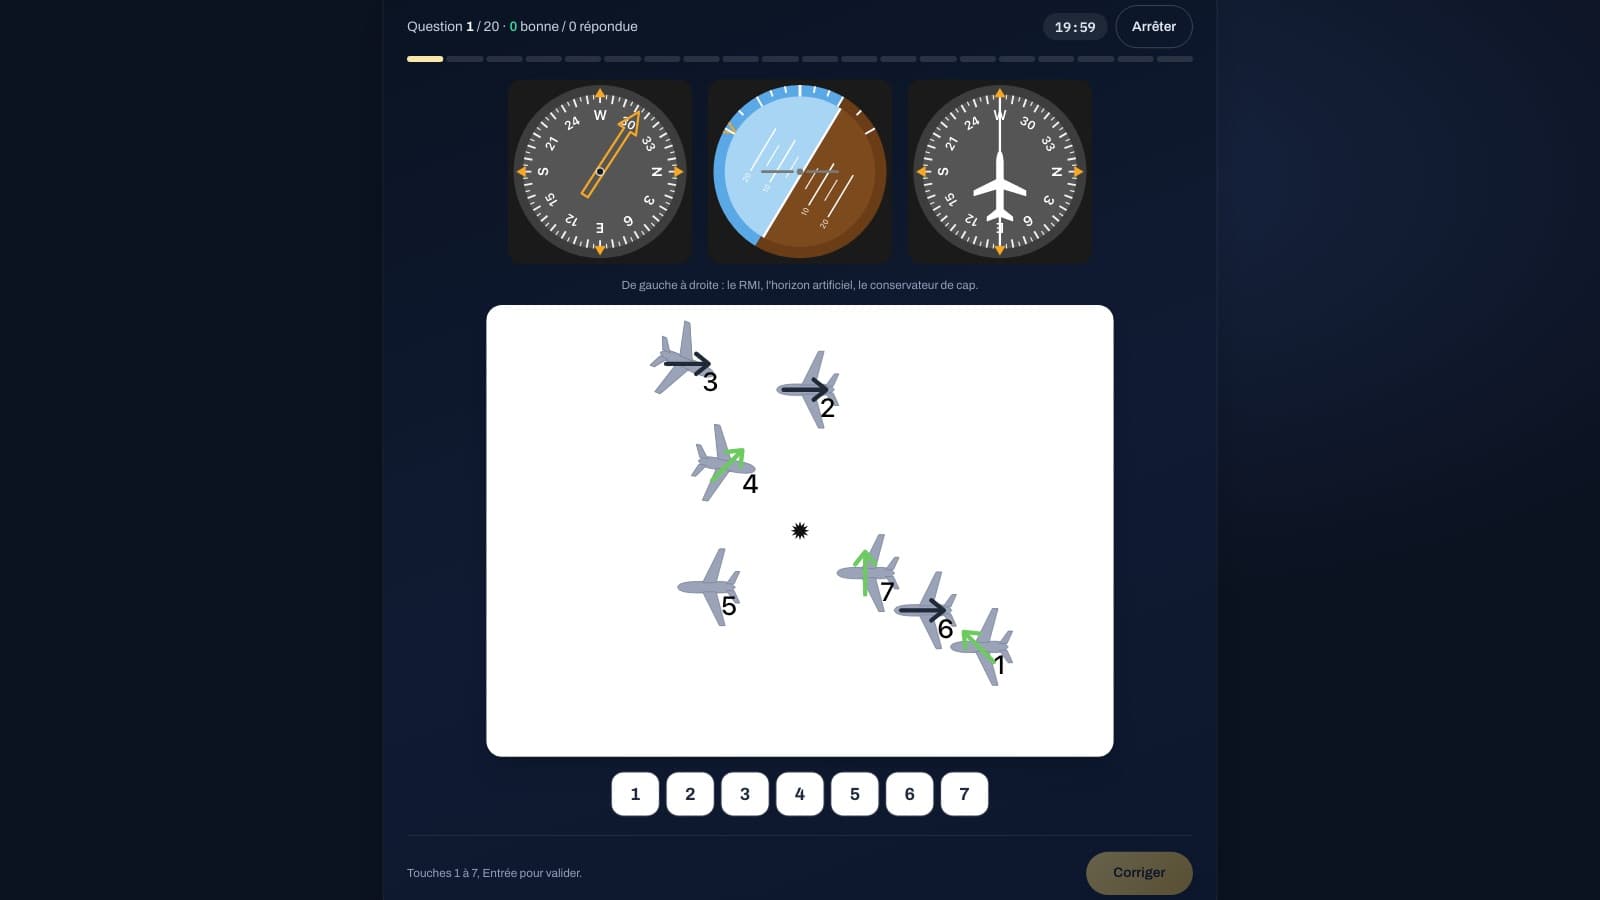
Three dials, one map, seven aircraft: the orientation test asks you to work out which aircraft matches what the RMI, the artificial horizon and the heading indicator are showing. It is a training exercise, not an official test, but these three are real flight instruments, and knowing how to read them and relate them to one another is part of the basics of instrument flying. Here is the method.
The heading indicator: where you're looking from
The heading indicator, also known as the directional gyro, gives the aircraft's magnetic heading, that is the angle between magnetic north and the aircraft's longitudinal axis, measured clockwise. The compass card rotates, and the heading is read under the fixed index mark at the top. A heading of 270° means the aircraft is flying west, and a heading of 180° means it is flying south.
On the compass card, the numbers are written in tens of degrees: 3 for 030°, 6 for 060°, 12 for 120°, 15 for 150°, 21 for 210°, 24 for 240°, 30 for 300°, 33 for 330°, and the letters N, E, S, W for 000°, 090°, 180° and 270°. Learn this correspondence by heart: it will save you time on every reading.
The RMI: where is the beacon relative to the nose?
The RMI (radio magnetic indicator) combines the compass card with a needle that points towards a radio beacon, for example an NDB. The needle shows the direction in which the beacon lies. What matters for the exercise is its angle from the top of the dial, measured clockwise: this is the relative bearing of the beacon, the angle between the aircraft's nose and the beacon.
A needle at 90° means the beacon is exactly to the right, at 270° exactly to the left, and at 180° directly behind. The relative bearing is therefore read to the left or right of the nose: 147° to the left, for example, reads as 213° clockwise. Also remember the formula: the bearing to the beacon, that is its direction from north, equals heading plus relative bearing, modulo 360°.
The artificial horizon: bank and pitch
The artificial horizon shows the aircraft's attitude: bank (left or right) and pitch (nose up or nose down). The sky is blue and the ground is brown. When the aircraft banks right, the horizon line tilts the opposite way: its right-hand side rises. When the aircraft climbs, the horizon line moves down in the dial, and more sky is visible.
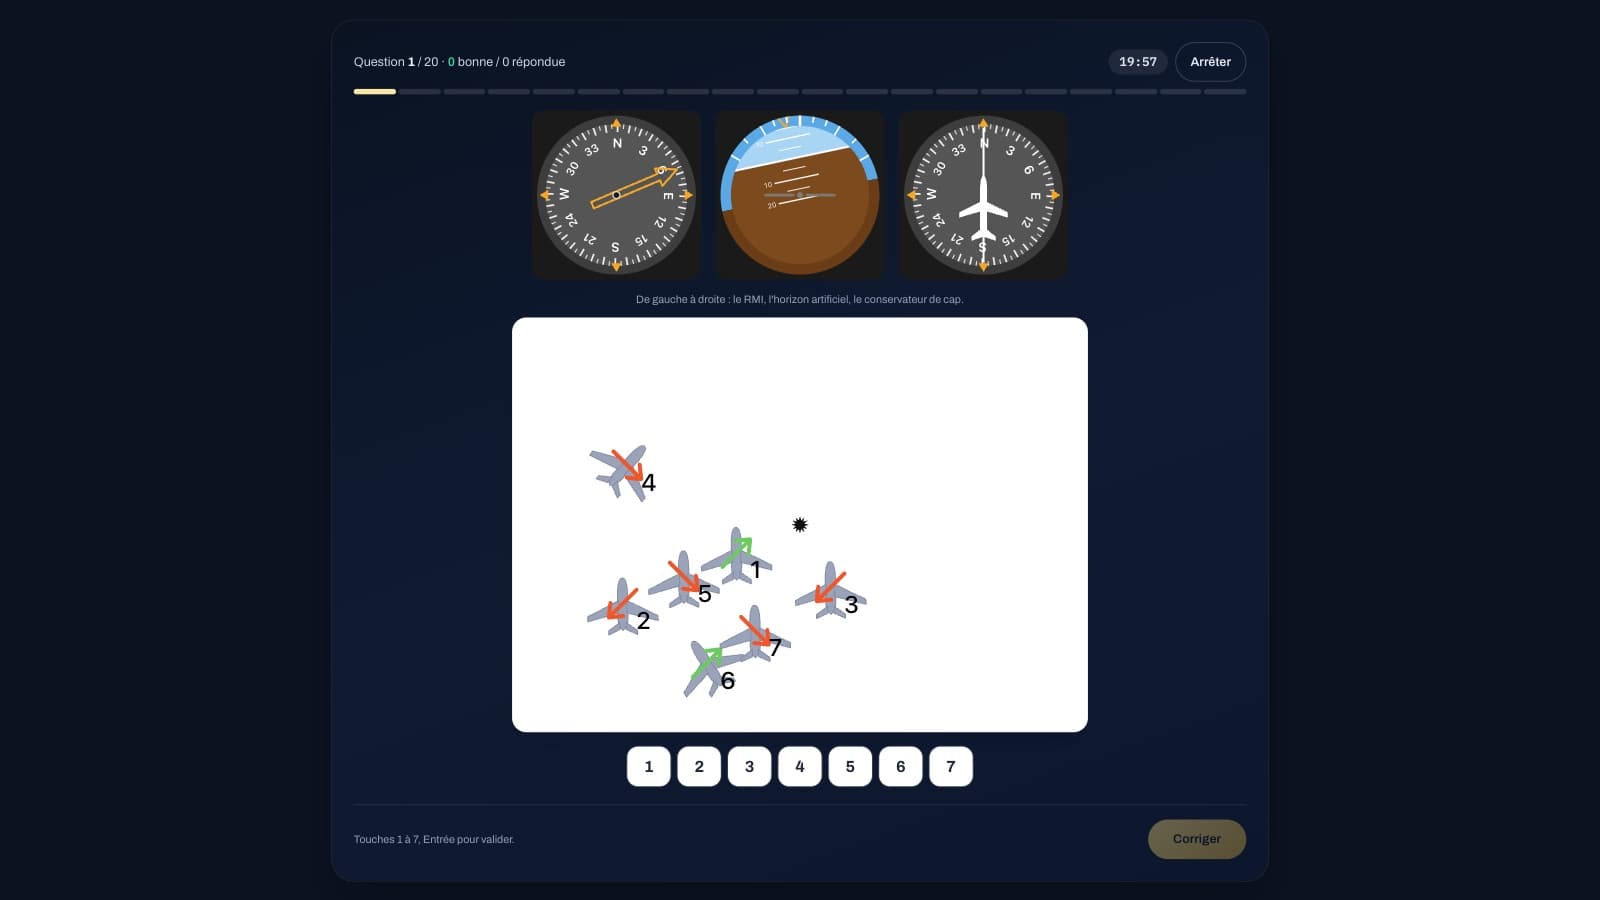
On the exercise map, each aircraft's arrow sums up its attitude: green for a climb, red for a descent, grey for level flight. An arrow pointing to the right or left of the screen shows the direction of a turn, a green arrow pointing up or a red arrow pointing down shows a straight climb or descent, and an aircraft with no arrow is in straight-and-level flight. So read the horizon first, to know which arrow to look for.
Finding the aircraft: three criteria, in this order
First eliminate by attitude: keep only the aircraft whose arrow has the right colour and direction, or the aircraft with no arrow if the horizon shows straight-and-level flight. Then move on to heading: look at the orientation of each remaining aircraft on the map, relative to north (at the top of the screen), and compare it with the heading read on the heading indicator.
Finish with the beacon: from the aircraft, the beacon (the star at the centre of the map) must lie at the angle shown by the RMI needle, on the correct side of the nose. In the final questions, all the aircraft have the same arrow, so you need to read the heading and the relative bearing precisely. A useful rule of thumb: the wrong aircraft differ by at least 30° in heading or in relative bearing, or are set apart by their arrow.
The trap of the direction of rotation
One trap to avoid is confusing left and right: a relative bearing of 38° to the right and a relative bearing of 38° to the left do not point to the same aircraft. Always mentally place yourself in the aircraft, facing its nose (which points in the direction of the aircraft's heading, not necessarily towards the top of the screen), and look at which side the beacon is on. For an aircraft flying south, its right-hand side is on the left of the screen, which is disorienting at first.
On ForAllPilots, with the "Show corrections" option (enabled by default), the "Check answer" button draws both angles from the correct aircraft: the heading from north (in blue), then the relative bearing to the beacon (in purple), so you can work through the reasoning yourself. The orientation test is included with the ATPL subscription. It is a training exercise, not an official test: it does not reproduce the test of any school or airline, and it does not replace studying instrumentation in your course.