Psychometric tests for pilots
Rotating Maze: Cracking the DLR Test Method
By ForAllPilots · Published · 5 min read
Reviewed and approved by the site's editor before publication. Our method (FR)
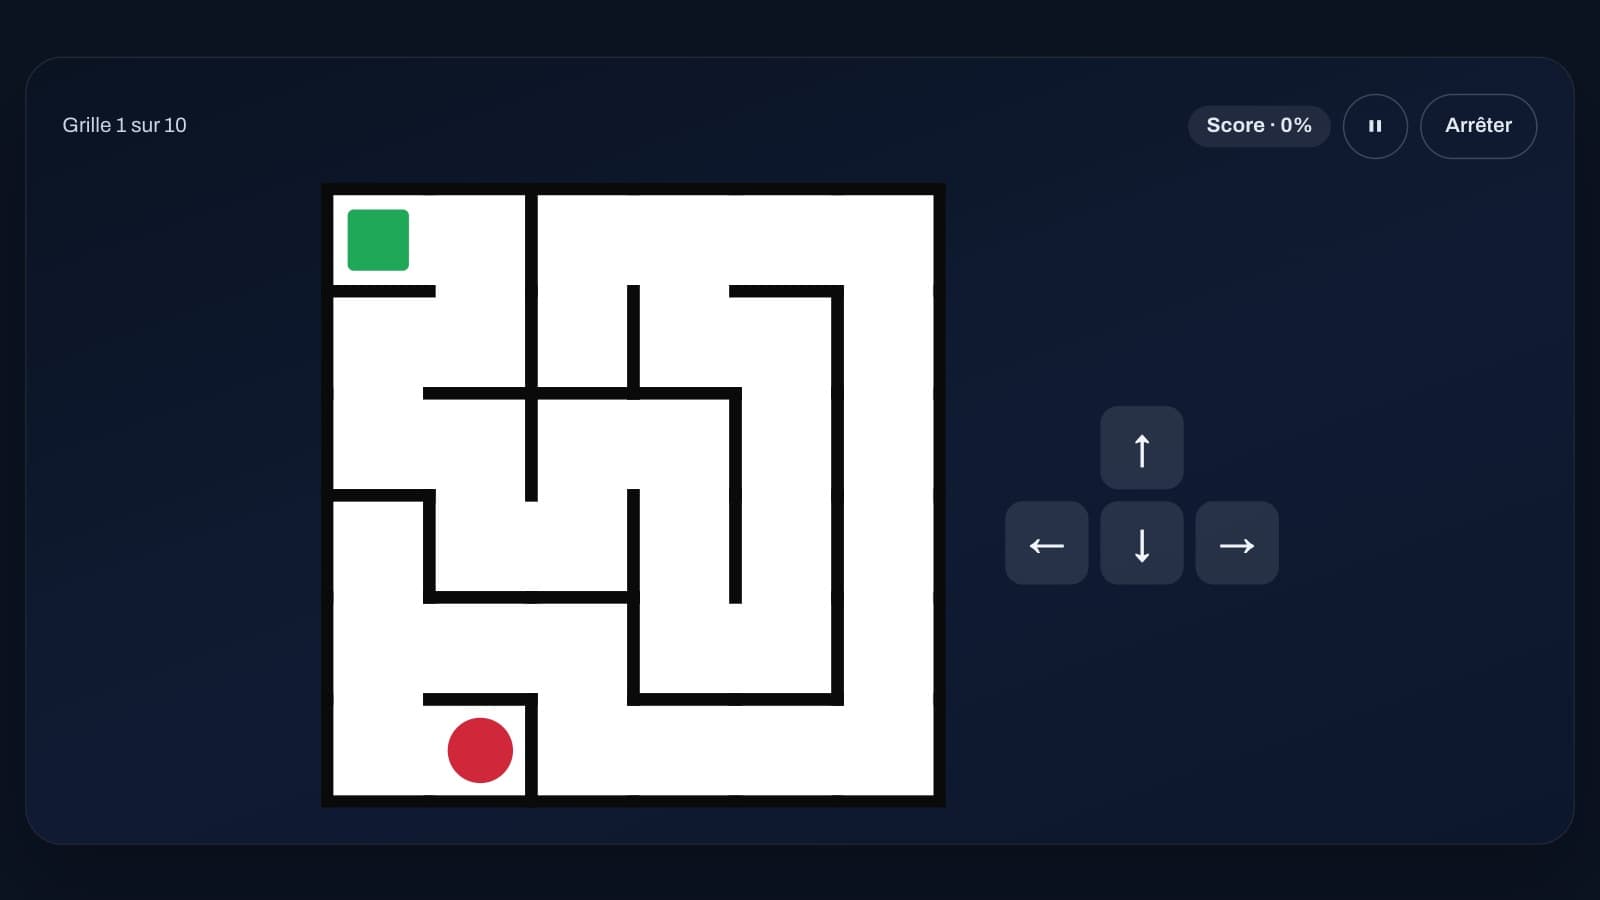
In the rotating maze, a ball must reach the exit along a single path, but the layout is rotated by a different angle on every grid, while the four buttons always keep the same meaning. The exercise is therefore won in your head before it's won with your fingers. Here's how to find your bearings, what the score measures, and the mistakes to avoid.
What the exercise asks of you
The rotating maze series, in the DLR tab of ForAllPilots, runs through ten grids one after another. On each one, a red ball starts in a cell and must reach a green square, the exit. There is only one path between the two: no loops, never two ways of getting there, only dead ends to avoid.
You move using four buttons (up, down, left, right) or the keyboard arrow keys. Each press moves the ball forward one cell if the way is open. A press that runs into a wall doesn't move the ball, but it still counts against your score, as we'll see below.
The trap: the buttons don't rotate with the layout
The four buttons always send the ball in the same direction within the maze, regardless of the grid. What changes is the angle at which the grid is drawn: 0°, 90°, 180° or 270°, chosen at random for each grid. At 0°, everything feels natural: “up” moves the ball upward on screen. As soon as the layout is rotated, the opening that appears to lead toward the top of the screen is no longer the one controlled by the “up” button.
Here's the mapping, with the layout rotated clockwise. At 90°, “up” sends the ball to the right of the screen, “right” sends it down, “down” sends it left, and “left” sends it up. At 180°, everything is reversed: “up” goes down, “down” goes up, “left” goes right and “right” goes left. At 270°, “up” sends the ball to the left of the screen, “left” sends it down, “down” sends it right, and “right” sends it up.
There's no need to memorize this table. Just imagine that your arrow pad is rotated by the same angle as the layout, in the same direction: at 90°, the “up” arrow points to the right of the screen, and the other three follow suit.
Finding the angle with the first press
Nothing in the layout indicates the grid's angle: no compass, no reference marker. The starting point, however, has one distinctive feature. The ball always starts at the back of a dead end, with a single opening, and the exit is likewise located at the back of a dead end. So you know which side of the screen the ball needs to head toward, but not which button gets it there.
The first press on each grid is therefore a probe. Spot the single opening at the starting cell, try the button you think is most likely, and as soon as the ball moves, watch which direction it goes on screen: from that you can work out the grid's angle, and everything is then known for the rest of the route. If the press hits a wall, the cell briefly flashes red: rule out that button and try another, without getting flustered, since a single wasted step only costs you a few points.
Reading the path before pressing
Since the path is unique, you can trace it with your eyes before the first press. As both ends are dead ends, you can follow it starting from the ball or from the green square: start with whichever side has fewer junctions, and identify the key turns by naming them in on-screen terms: straight ahead, right, left, left.
Once you know the angle, translate this route into button presses: for each segment, say the on-screen direction to yourself, then the button that corresponds to it at that angle. When the path keeps going straight, keep repeating the same button without re-checking at every cell. It's only at the turns that you need to re-translate.
What the score measures
The score for a grid compares the number of steps you took to the shortest possible path. It's 100% when you've taken no more steps than that path and hit no walls. Otherwise, it's the shortest route divided by your total steps, including walls hit, rounded and capped at 100. A one-cell detour into a dead end, there and back, adds two steps; hitting a wall adds one.
For example, if the shortest path is 24 steps and you take 26 without hitting a wall, you score 92%; if you also hit a wall, you drop to 89%. The series score is the average of your ten grids. Time doesn't enter into the calculation: it's displayed at the end, but only the route is scored. The results screen breaks down each grid as “92% (26 steps, 24 at shortest)”, which shows you immediately where you lost points.
Keep the orders of magnitude in mind. Across thousands of generated grids, the shortest path ranged from 19 to 35 steps, so one extra step costs you roughly three to five points. Aiming for 100% on every grid partly depends on luck with the first press; aiming for a detour-free route, once the angle is known, depends only on you.
The mistakes that cost you the most
The first is reflex: pressing the button that matches the direction seen on screen without having worked out the angle. On a rotated grid, this produces a string of walls hit. The second is forgetting the angle partway through the grid; before a turn, remind yourself of the mapping, for example “at this angle, up equals right on screen.” The third is heading into a dead end without having read the path: backtracking counts as steps. Finally, there's rushing: the score doesn't reward speed, so it's worth taking two extra seconds to trace the route.
Training under good conditions
A series consists of ten grids, using the keyboard arrows or the on-screen buttons. The Pause button freezes the exercise; “Stop” offers to show you your results based on what's already been done, but the series is then kept as interrupted and doesn't count toward your statistics. Your best score stays on your device.
Start with one series to get a feel for the effect of the angles, without worrying about the score, then do a second one applying the method: probe, work out the angle, trace the path, translate. Compare the two series grid by grid: it's the number of steps beyond the shortest path that tells you where you're losing points.
The rotating maze is included with the ForAllPilots ATPL subscription. It's a training exercise, not an official test: it doesn't reproduce the test of any school or organization, ForAllPilots is not affiliated with any of them, and it measures neither medical fitness nor piloting skill.